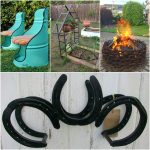
Halloween is upon us, and flickering jack o lanterns are turning up on every patio in America. This year, rather of sculpting a pumpkin that will rot earlier than later on, why not put your welding abilities to work to develop a pumpkin you can take pleasure in every year?
Lantern Welding Project
If you have a MIG welder and a plasma cutter, you’re all set to bond your own aluminum lawn pumpkin. To start, utilize your plasma cutter to develop the shape of your pumpkin and eliminate the interior facial information.
Next, utilizing scraps, tack bonded extra functions onto your pumpkins such as a stem and leaves. You can utilize 2-inch steel around your eyes, nose, and mouth to develop a framed overview and include measurement. End up by grinding your edges smooth and using a shiny coat of orange paint. Connect some thick pieces of metal if you wish to stake your piece into the ground, or avoid this action if you prepare to hang it, or lean it versus something.
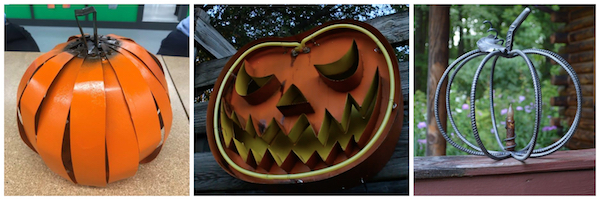
Sheet Metal Pumpkin Welding Project
This project is an excellent method to develop your welding abilities and practice tack welding numerous pieces together into one, cohesive shape. To begin, you’ll wish to cut 8-10 pieces of equivalent size sheet metal to produce your pumpkin shape.
Then, thoroughly shape and secure your pieces together and bonded them into the location from the within the pumpkin. Repeat this procedure with each area of the pumpkin up until you get to the last piece which will require to be bonded from the outdoors and ground smooth. Connect a stem by welding a little piece of sheet metal into a tube, and include a leading to it, if preferred. Complete your project by leaving the piece rustic or spray painting it a fall orange.
Rebar Pumpkin Welding Project
This project might appear easy, however, if you have not dealt with rebar prior to, forming it can be a bit challenging. A lot of rebars wasn’t produced to flex and can be breakable, so make certain you pick weldable rebar when collecting products.
Start by producing a jig for your pumpkin out of wood- basically you desire a circular piece of wood installed to a bigger board with a bolt, around which you can form your rebar evenly. You’ll wish to do this with 8-10 pieces of rebar to develop your pumpkin.
To bond your pumpkin together, clamp and weld each piece to the main point on top and bottom till your pumpkin base has actually taken shape. Complete your project by including an imaginative stem and leaves, painting it if wanted or leaving it bare for a more commercial appearance.